Best Boat Plans Free for Aspiring Boat Builders and DIYers

Best Boat Plans Free for Aspiring Boat Builders and DIYers

Best Free Boat Plans for DIY Boat Builders

Hey there, fellow boat enthusiasts! So you're dreaming of building your own boat, huh? That's awesome! Building a boat is a hugely rewarding project, but let's be honest, those professional boat plans can cost a pretty penny. That's why I'm sharing some of the best places to find free boat plans for aspiring boat builders and DIYers like yourself.

Where to Find Your Perfect Free Boat Plans

Finding truly *good* free boat plans takes a little digging, but I've done the hard work for you. These sites offer a variety of plans, from simple canoes and kayaks to slightly more challenging small sailboats. Remember to carefully evaluate the plans before you start â€" some might need adjustments based on your skill level and available materials.

Online Forums and Communities

Online forums dedicated to boat building are goldmines of information, including free boat plans! Sites like the Boatbuilding.com forums or others focusing on specific boat types (like kayak or canoe building) often have members who share their plans. Don't be shy â€" join the conversation, ask questions, and you might just find the perfect design!

Websites with Free Boat Plans

Several websites specifically offer free boat plans, though the quality and complexity can vary widely. Always check the reviews and comments before downloading anything. Look for sites that offer detailed instructions, diagrams, and material lists. A few potential starting points could include websites dedicated to wooden boat building or specific boat types.

Educational Institutions and Libraries

Believe it or not, some educational institutions and libraries have archives of old boat plans! They might not be digitally available, but a visit to a maritime museum or a university with a nautical engineering program might unearth some hidden treasures. It's a little more old-school, but you might find unique and historically significant plans.

Types of Boats You Can Build from Free Plans

The beauty of free boat plans is the variety! You can find plans for almost any small watercraft. Here are a few popular options:

  • Kayaks and Canoes: These are often great starting points for beginners due to their simpler designs.
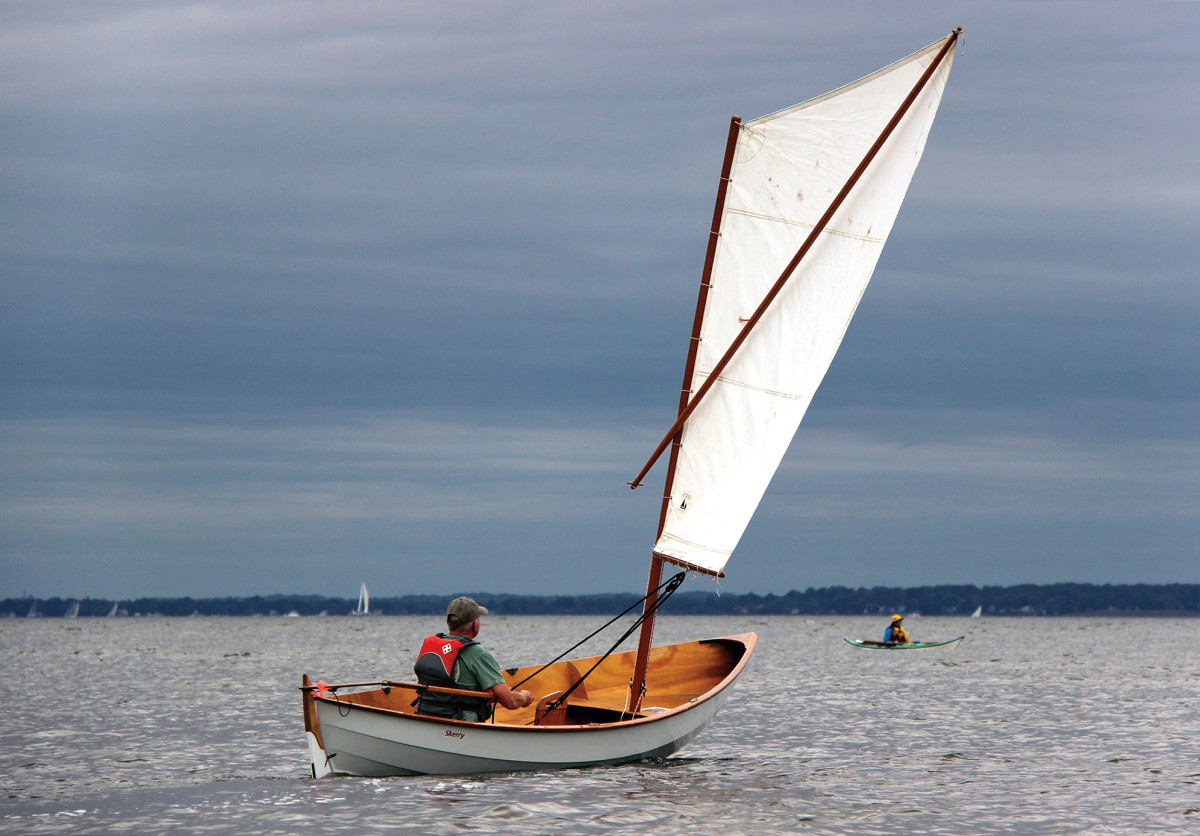
  • Small Sailboats: Slightly more challenging, but equally rewarding.
  • Rowboats: A classic and timeless design.
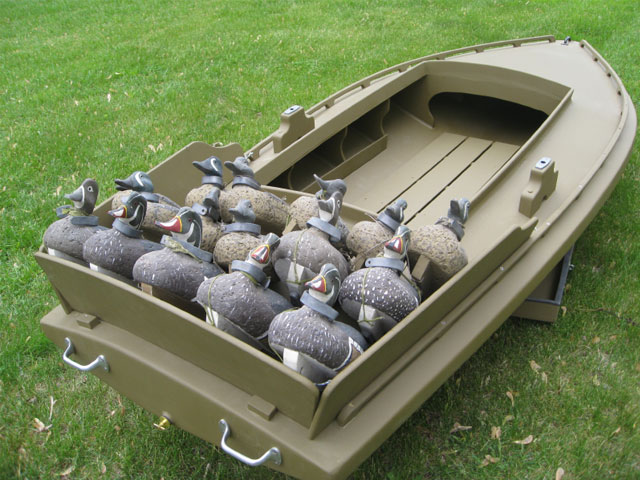
  • Simple Dinghies: Small, easy-to-build boats, perfect for exploring shallow waters.

Tips for Choosing the Right Plans

Before diving in, take a moment to consider:

  • Your Skill Level: Start with a simpler design if you’re a beginner. Don't bite off more than you can chew!
  • Available Tools and Materials: Ensure you have access to the necessary tools and materials.
  • Boat Size and Purpose: What will you use the boat for? Fishing, recreation, or something else? This will determine the ideal size and design.
  • Plan Completeness: Check for detailed diagrams, material lists, and step-by-step instructions.

Commonly Asked Questions

Q: Are these plans truly free?

A: Yes, but keep in mind that some sites might require registration or a small donation. Always check the terms and conditions before downloading.

Q: How accurate are free boat plans?

A: Accuracy varies. Thoroughly review the plans and seek feedback from experienced boat builders if you have any doubts. Sometimes, you might need to adjust the plans based on your materials and your skills.

Q: What kind of materials will I need?

A: This depends entirely on the boat design. The plans should provide a detailed list of materials, but be prepared to source lumber, fiberglass, epoxy, and other materials accordingly. Also consider things like fasteners and paint.

Q: Is building a boat from free plans safe?

A: Safety is paramount. Always follow the instructions carefully and prioritize safety procedures. If you're unsure about any aspect of the build, seek advice from experienced boat builders.

Happy boat building! Remember, the journey is as important as the destination. Don't hesitate to reach out to online communities for support and advice along the way. You got this!
Share:

The Benefits of Building a Small Boat with Detailed Plans

The Benefits of Building a Small Boat with Detailed Plans

Building a Small Boat from Detailed Plans: A Rewarding Project

So, you're thinking about building a small boat? That's awesome! It's a challenging but incredibly rewarding project. And let me tell you, having detailed plans makes all the difference. Whether you're a seasoned woodworker or a curious beginner, this article will show you why building from plans is the way to go.

Why Use Detailed Plans?

Think of detailed plans as your roadmap to success. They're not just a bunch of pictures; they're a comprehensive guide that minimizes guesswork and maximizes your chances of building a safe and seaworthy vessel. Without them, you're essentially navigating uncharted waters (pun intended!), which can lead to frustration, wasted materials, and even safety issues.

Accuracy and Precision

Detailed plans provide precise measurements, angles, and joinery details. This ensures all your components fit together perfectly, resulting in a strong and well-built boat. No more frantic measuring and adjusting â€" you'll know exactly what you need to do, step by step.

Material Savings

With accurate plans, you'll know exactly how much lumber, hardware, and other materials you need. This avoids unnecessary purchases and prevents costly material waste, saving you both time and money.

Reduced Frustration

Let's be honest, building anything can be frustrating. Detailed plans significantly reduce this frustration by providing clear instructions and eliminating the guesswork. You can focus on the enjoyment of the process rather than constantly second-guessing your work.

Benefits for Different Audiences

Building a boat from detailed plans offers unique benefits to various groups:

Hobbyists

For hobbyists, it's a fantastic way to learn new skills, develop patience, and create something truly unique and functional. It's a rewarding experience that combines craftsmanship with practical application.

Boat Builders

Experienced boat builders can use detailed plans to streamline their workflow, ensure consistency across multiple builds, and explore new designs efficiently. Plans allow for replication and adaptation, refining techniques over time.

Educational Institutions

Educational institutions can use boat building projects as a hands-on learning experience, teaching students about woodworking, design, engineering, and problem-solving. It’s a fantastic way to make learning tangible and engaging.

Woodworking Craftsmen

For woodworking craftsmen, it's a chance to showcase their skills on a larger, more complex project. Building a boat is a testament to their mastery of woodworking techniques and attention to detail.

Choosing the Right Plans

Choosing the right plans is crucial. Consider these factors:

  • Your skill level: Start with simpler designs if you're a beginner.
  • The type of boat: Kayaks, canoes, dinghies â€" each has its own construction challenges.
  • The available materials: Ensure the plans are compatible with the materials you can easily access.
  • The plan's clarity and detail: Look for plans with clear diagrams, step-by-step instructions, and material lists.

Commonly Asked Questions

Q: How long does it take to build a small boat?

A: This varies greatly depending on the boat's size and complexity, as well as your experience level. A simple kayak might take a few weeks, while a more complex dinghy could take several months.

Q: What tools do I need?

A: The necessary tools also depend on the plans, but generally, you'll need hand tools like saws, chisels, and planes, as well as power tools like drills and sanders. Your plans should provide a detailed list.

Q: How much does it cost to build a small boat?

A: The cost varies significantly depending on the materials you choose (e.g., cedar is more expensive than plywood). Expect to invest a few hundred to several thousand dollars, depending on the project's scale and complexity.

Q: Where can I find detailed boat plans?

A: You can find boat plans online, from specialized boat building suppliers, or in woodworking books. Be sure to carefully review the plans before committing to a purchase.

Building a small boat is a challenging and rewarding journey. With detailed plans as your guide, you'll be well on your way to enjoying the fruits of your labor â€" a beautiful, functional boat you built yourself!

Share:

How to Build a Wooden Boat with Custom Designs and Features

How to Build a Wooden Boat with Custom Designs and Features

Building Your Dream Wooden Boat: A Guide to Custom Design and Construction

So, you're dreaming of building your own wooden boat? That's awesome! It's a challenging but incredibly rewarding project. Whether you're envisioning a sleek racing dinghy, a sturdy fishing skiff, or a whimsical rowboat, this guide will walk you through the process of bringing your custom design to life.

Phase 1: Design and Planning â€" Getting Your Dream on Paper (and Computer!)

Before you even think about touching a saw, you need a solid plan. This isn't just about sketching a pretty picture; it's about the structural integrity of your vessel!

Sketching and Conceptualizing Your Design

Start with rough sketches. What kind of boat are you building? What size? What features are essential (e.g., storage, seating, motor mount)? Don't be afraid to brainstorm wildly! Look at existing boat designs for inspiration, but remember, you're aiming for something unique.

Software and Detailed Plans

Once you've got a general idea, it's time to get serious. Boat design software (like FreeShip or Rhino) can be a lifesaver. These programs let you create detailed 3D models, calculate displacement, and generate precise plans for cutting your lumber. If software isn't your thing, you can always work with a naval architect â€" they're experts in ensuring your boat design is safe and seaworthy.

Material Selection â€" Picking the Right Wood

The wood you choose significantly impacts your boat's performance and longevity. Cedar and mahogany are popular choices for their rot resistance and workability. Oak is strong but heavier. Research different species and consider their properties before making a decision. Remember to account for the cost and availability of your chosen wood.

Phase 2: Construction â€" From Lumber to Launching!

This is where the real work begins. Take your time, be precise, and don't be afraid to ask for help!

Preparing the Lumber

Properly preparing your wood is crucial. This includes milling it to the exact dimensions specified in your plans, accounting for shrinkage and warping. Always use quality tools and take your time to avoid mistakes. Think of it as surgery â€" precise cuts and careful planning.

Building the Frame (Skeleton)

The frame provides the boat's basic shape and strength. This often involves creating strong ribs and frames, carefully aligning and fastening them according to your plans. Accuracy is key here; any mistakes will be amplified as you move to the next stage.

Planking â€" Skinning the Frame

Planking involves attaching thin strips of wood to the frame, creating the boat's outer hull. This is a painstaking process that requires precision and patience. You'll likely need various clamps, and techniques like scarfing might be necessary to join longer planks.

Finishing Touches â€" Adding the Details

Once the hull is complete, it's time to add the finishing touches: decks, seats, paint, varnish, and any custom features you designed. This is where your boat truly starts to take shape and reflect your unique vision. Consider adding non-slip surfaces where needed for safety.

Phase 3: Testing and Refinements â€" Making it Seaworthy

Before taking your boat out for a spin, you'll need to test its seaworthiness. This might involve a careful inspection for leaks, a weight test, and possibly a stability test.

Leak Testing

Fill the boat with water (carefully!). Look for any leaks and seal them appropriately. This step is vital to ensure your safety on the water.

Stability Testing

This might involve shifting weight around the boat to assess its stability. If you're not confident in your own ability to judge stability, consult an expert.

Sea Trials

Finally, take your boat for a test run in calm waters. Assess how it handles, pay close attention to any issues, and make any necessary adjustments. You might need to refine parts to improve its functionality.

Commonly Asked Questions

  • How long does it take to build a wooden boat? This varies greatly depending on the size and complexity of the boat, your experience, and the time you can dedicate to the project. Expect it to take months, or even years, for larger vessels.
  • What tools do I need? You'll need a range of woodworking tools, including saws, planes, chisels, clamps, and possibly specialized boat-building tools. Don't skimp on quality tools; they'll make the job easier and safer.
  • How much does it cost? The cost depends on the size, materials, and complexity of your boat. You can save money by sourcing materials yourself, but it's still a significant investment.
  • Do I need any special skills? While woodworking experience is beneficial, you can learn the necessary skills through books, online tutorials, and workshops. Consider taking a boat-building course.
  • Is it safe to build a boat at home? Safety should be your top priority. Always follow safety guidelines, use appropriate protective gear, and seek help if needed.

Building a wooden boat is a journey of skill, patience, and creativity. Enjoy the process and the immense satisfaction of creating something beautiful and functional with your own hands. Fair winds!

Share:

Building a Wooden Boat for Stability, Safety, and Comfort

Building a Wooden Boat for Stability, Safety, and Comfort

Building Your Dream Wooden Boat: Stability, Safety, and Comfort

So, you're thinking about building a wooden boat? That's awesome! There's something truly magical about working with wood, and the satisfaction of creating something beautiful and functional with your own two hands is unparalleled. But building a boat isn't just about aesthetics; it's about ensuring it's stable, safe, and comfortable enough for you and your crew. This guide will walk you through the key considerations for achieving all three.

Choosing the Right Design

Before you even think about buying lumber, you need a plan. And I mean a *good* plan. Don't just grab a random design from the internet; do your research. The right design is crucial for stability, safety, and comfort, and it all depends on your intended use. Are you building a small fishing boat, a graceful sailboat, a sturdy rowboat, or something else entirely?

Considering Your Needs

Think about these factors:

  • Intended use: Fishing, sailing, rowing, cruising?
  • Water conditions: Calm lakes, rough seas, gentle rivers?
  • Number of passengers: How many people will be onboard regularly?
  • Storage needs: How much gear will you need to carry?
  • Your skill level: Be realistic about your woodworking experience. A simple design might be a better starting point than a complex one.

Once you have a clear understanding of your needs, you can start searching for plans. There are countless resources available online, in books, and from boat design companies. Consider purchasing professionally drawn plans; they will save you headaches down the line.

Prioritizing Stability

Stability is paramount. A boat that tips easily is dangerous and no fun. Here's how to build for stability:

Understanding Hydrostatics

This isn't rocket science, but it's important to grasp the basic principles. A boat's stability depends on its shape, weight distribution, and center of gravity. A wider beam (the widest part of the boat) generally translates to greater initial stability. However, excessive beam can impact speed and maneuverability. Finding the right balance is key.

Proper Ballasting

Properly distributing the weight is essential. Heavy items should be placed low in the hull to lower the center of gravity. Think about the placement of your engine (if you have one), fuel tanks, and other heavy equipment. Even the distribution of passengers impacts stability â€" avoid having everyone crowd one side of the boat.

Selecting the Right Wood

The type of wood you choose plays a significant role. Hardwoods like oak, cedar, and mahogany are popular choices for their strength, durability, and resistance to rot. However, they can be more expensive and difficult to work with. Softwoods like pine are more affordable and easier to shape but might require more maintenance.

Ensuring Safety

Safety should always be your top priority. A poorly built boat can be incredibly dangerous. Here are some key safety considerations:

Robust Construction Techniques

Pay close attention to the details of your construction. Use strong joints, proper fastening methods (screws, bolts, epoxy), and ensure all components are securely attached. Don't cut corners â€" it could cost you dearly.

Watertight Hull

A leaky boat is a dangerous boat. Make sure your hull is completely watertight. Use high-quality caulking and sealant to prevent leaks. Consider using marine-grade plywood for increased water resistance. Test the hull thoroughly before launching.

Essential Safety Equipment

Never go out on the water without proper safety equipment. This includes life jackets (for everyone onboard!), a throwable flotation device, a bilge pump, flares, a whistle, and a first-aid kit. Knowing how to use this equipment is just as important as having it.

Building for Comfort

While safety and stability are paramount, comfort is important too! A comfortable boat makes for a more enjoyable experience.

Ergonomic Design

Think about the layout of your boat. Are the seats comfortable? Is there enough space to move around easily? Are controls and equipment easily accessible? Consider adding features that enhance comfort, like cushioned seats, adequate storage, and a shaded area.

Weather Protection

Depending on your boat's intended use, you might want to consider adding a canopy or other weather protection. This will make your boating experience much more enjoyable, especially in inclement weather.

Finishing Touches

Once the boat is built and sealed, consider adding a finish to protect the wood and enhance its appearance. Marine-grade varnish or paint will provide protection from the elements and UV damage. Consider adding non-slip surfaces in areas where people might walk.

Commonly Asked Questions

Q: How long does it take to build a wooden boat?

A: It varies greatly depending on the size and complexity of the boat, as well as your skill level and the time you can dedicate to the project. It could take anywhere from a few weeks to several months, or even years for a larger vessel.

Q: How much does it cost to build a wooden boat?

A: The cost depends heavily on the size, materials, and complexity of the boat. Expect to invest a significant amount of money in lumber, tools, and other materials. It's often cheaper than buying a comparable boat, but it's not a cheap undertaking.

Q: Do I need any special tools?

A: Yes, you'll need a range of woodworking tools, including saws, planes, chisels, drills, clamps, and sanding tools. Investing in high-quality tools will make the process much easier and safer.

Q: Can I build a boat without prior experience?

A: It's possible, but strongly advised against for anything more complex than a very simple design. Start with smaller projects to gain experience before tackling a boat. Consider taking a woodworking course or finding a mentor.

Q: Where can I find plans?

A: You can find boat plans online (Glen-L Marine Designs, for example), in books at libraries and bookstores specializing in boatbuilding, or through boat design companies.

Building a wooden boat is a challenging but rewarding project. By carefully planning, prioritizing safety, and paying attention to detail, you can create a beautiful, stable, safe, and comfortable boat that you'll cherish for years to come. Good luck, and happy building!

Share:

Creating a Custom Timber Boat with Easy-to-Follow Plans

Creating a Custom Timber Boat with Easy-to-Follow Plans

Building Your Dream: A Step-by-Step Guide to Crafting a Custom Timber Boat

The rhythmic lap of water against wood, the sun warming your face as you navigate tranquil waters â€" the allure of owning a handcrafted timber boat is undeniable. Forget mass-produced fiberglass; this guide empowers you to build your own unique vessel, tailored to your exact specifications. We'll walk you through each stage, providing clear, easy-to-follow plans that transform raw timber into a beautiful and functional boat.

Phase 1: Design and Planning â€" Your Boat, Your Vision

Before the first plank is cut, careful planning is crucial. This phase involves translating your dream boat into a workable design. Begin by determining the boat's intended use. Will it be a leisurely fishing boat, a nimble canoe, or a sturdy rowboat? Consider its length, width, and depth, balancing stability with maneuverability. Sketch your design, noting key dimensions and features. You might find free boat plans online for inspiration but remember to adapt them to your skill level and desired aesthetics. Don't be afraid to experiment; this is your chance to create something truly unique!

Choosing Your Timber

Selecting the right timber is paramount to your boat's longevity and performance. Cedar, redwood, and oak are popular choices for their water resistance and strength. Consider factors such as the wood's grain, knots, and overall quality. Source your timber from reputable suppliers, ensuring it's properly seasoned to prevent warping and cracking. The cost will vary depending on the type and quantity of timber needed. Factor this into your overall budget.

Phase 2: Construction â€" Bringing Your Design to Life

With your plans finalized and timber selected, the actual construction begins. This phase involves meticulous craftsmanship and attention to detail. Start by carefully cutting the planks according to your design. Precise measurements are critical for a structurally sound and aesthetically pleasing boat. Use a combination of hand tools and power tools â€" a jigsaw, hand plane, and chisels will prove invaluable. Remember safety first! Always wear appropriate safety gear, including eye protection and hearing protection.

Assembling the Hull

The hull assembly is a key stage. Depending on your chosen design, you might employ traditional techniques like carvel (overlapping planks) or clinker (lapstrake) construction. Use marine-grade epoxy and screws or fastenings designed for exterior use. Ensure each plank is properly aligned and secured to maintain the hull's integrity. This stage will benefit from a strong workbench or sturdy construction table to work on.

Adding the Deck and Finishing Touches

Once the hull is complete, you can add the deck and any other features, like seats, oarlocks, or a rudder. Sand all surfaces smooth, paying particular attention to any sharp edges or uneven areas. Apply several coats of marine-grade varnish or paint to protect the wood from water damage and UV degradation. This is the final flourish; take your time and pride in your handiwork!

Phase 3: Testing and Refinement â€" Setting Sail!

Before your maiden voyage, conduct a thorough inspection of your handcrafted timber boat. Check for any leaks, loose fastenings, or other potential problems. A final coat of varnish or sealant adds an extra layer of protection. Once satisfied, it's time to launch your creation! Begin with calm waters, testing the boat's stability and handling. You might need to make minor adjustments based on your experience on the water.

Maintenance and Care

With proper care, your timber boat will provide years of enjoyment. Regularly inspect for any signs of wear and tear, and promptly address any issues. Store your boat in a sheltered area when not in use, and apply a fresh coat of varnish or paint periodically to maintain its protection and beauty. This is more than just building a boat; it’s creating a legacy!

Building a custom timber boat is a challenging but immensely rewarding project. This detailed guide provides a solid foundation. Remember, patience and precision are key. Enjoy the journey!

Share:

Step-by-Step Guide to Building Your Own Sailing Boat

Step-by-Step Guide to Building Your Own Sailing Boat

A Comprehensive Guide to Constructing a Sailing Vessel

Building your own sailing boat is a challenging yet deeply rewarding endeavor. It demands a significant investment of time, skill, and resources, but the satisfaction of navigating waters in a vessel of your own creation is unparalleled. This guide provides a comprehensive overview of the process, breaking down the complexities into manageable steps. Remember, safety is paramount throughout this process. Always adhere to relevant safety regulations and seek professional guidance when necessary.

Phase 1: Design and Planning

The foundation of any successful boatbuilding project lies in meticulous planning. A poorly conceived design will inevitably lead to difficulties and compromises throughout the construction phase. This initial phase involves several crucial steps:

1.1 Choosing a Design

Selecting the right design is crucial. Consider your experience level, available resources, intended use, and desired performance characteristics. Beginners should opt for simpler designs such as a small dinghy or a plywood sailboat kit. More experienced builders might consider more ambitious projects like a fiberglass or strip-plank vessel. Numerous online resources and boat design books offer a wide array of plans. Factors to consider include:

  • Boat type: Dinghy, daysailer, keelboat, etc.
  • Hull material: Plywood, fiberglass, strip-plank, aluminum.
  • Size and dimensions: Length, beam, draft.
  • Sail plan: Type and size of sails.
  • Construction method: Stitch-and-glue, carvel, lapstrake.

1.2 Acquiring Plans

Once a design is chosen, acquire detailed plans. These plans should include comprehensive drawings, material lists, and construction instructions. Reputable sources for boat plans include established boat design firms, nautical publications, and online plan suppliers. Ensure the plans are compatible with your skillset and resources. Inspect the plans thoroughly for clarity and completeness before proceeding.

1.3 Material Selection and Acquisition

The choice of materials significantly impacts the boat's strength, durability, and cost. Carefully review the plan's material list and source high-quality materials from reputable suppliers. For plywood construction, marine-grade plywood is essential to resist rot and water damage. Fiberglass requires specialized resins and cloth. Accurate quantification of materials is vital to avoid delays and unnecessary expenses. Consider purchasing materials with a small margin of error to account for potential mistakes or unforeseen requirements.

Phase 2: Construction

The construction phase is the most time-consuming and demanding part of the project. It requires patience, precision, and a methodical approach. The specific steps will vary depending on the chosen design and construction method. However, several common steps apply to most boatbuilding projects:

2.1 Hull Construction

This involves building the main body of the boat. For plywood construction, this may involve cutting and assembling the plywood sheets according to the plans. For fiberglass construction, it involves creating a mold, laying up fiberglass cloth and resin, and allowing it to cure. Strip-plank construction involves carefully fastening thin strips of wood to form the hull. Precision is crucial during this phase. Proper alignment and fastening are critical for structural integrity.

2.2 Deck Construction

The deck construction follows the hull. It involves creating the upper surface of the boat, incorporating features like hatches, cockpit, and deck fittings. Similar to hull construction, precision is paramount. Careful planning and execution are necessary to ensure proper fit and functionality.

2.3 Interior Fitting

Once the hull and deck are complete, the interior can be fitted out. This may involve installing bulkheads, seating, storage compartments, and other interior components. This phase requires careful consideration of weight distribution and ergonomics. Sufficient ventilation and drainage must be incorporated to prevent moisture buildup and damage.

2.4 Systems Installation

This stage involves installing essential systems, including the rudder, steering mechanism, rigging, electrical systems, and bilge pumping systems. Proper installation of these systems is crucial for the boat's safety and functionality. Seek professional advice if you lack experience in any of these areas. Rigging in particular requires specialized knowledge and should only be undertaken by competent individuals.

Phase 3: Finishing and Commissioning

Once the construction is complete, the boat needs finishing and commissioning before launching.

3.1 Finishing

This involves sanding, painting, varnishing, and applying any other necessary finishes. The choice of finish will depend on the materials used and desired aesthetics. Proper preparation is essential for a durable and attractive finish. Exterior finishes should provide UV protection and water resistance. Interior finishes should be durable and easy to clean.

3.2 Systems Testing

Thorough testing of all systems is critical before launching. This includes checking the rudder, steering, rigging, electrical systems, and bilge pump. Rigorous testing will identify and rectify any deficiencies before encountering them on the water.

3.3 Launching and Sea Trials

Launching the boat is an exciting milestone. Conduct thorough sea trials in calm waters to assess the boat's performance and identify any issues. This may require adjustments to the sails, rudder, or other systems. Gradually increase the intensity of the trials as confidence grows. Always prioritize safety and have appropriate safety equipment on board.

Conclusion

Building your own sailing boat is a significant undertaking that demands commitment, skill, and patience. Careful planning, meticulous execution, and a steadfast focus on safety are essential for success. The satisfaction of navigating your self-built vessel is a reward that will last a lifetime. Remember to consult with experienced boatbuilders and utilize available resources to maximize your chances of success.

Share:

DIY Mini Jet Boat Kits: How to Build Your Own Watercraft

DIY Mini Jet Boat Kits: How to Build Your Own Watercraft

DIY Mini Jet Boat Kits: How to Build Your Own Watercraft

The allure of the open water, the thrill of speed, and the freedom of crafting your own vessel â€" these are the elements that draw enthusiasts to the world of DIY mini jet boat kits. Building your own watercraft is an engaging and rewarding experience, allowing you to customize your boat and enjoy the fruits of your labor on the water. This comprehensive guide will delve into the world of mini jet boat kits, exploring the types available, the steps involved in construction, and the essential considerations for a successful build.

Understanding Mini Jet Boat Kits

Mini jet boat kits offer a unique blend of affordability, accessibility, and customization. These kits provide the essential components, blueprints, and instructions for assembling your own miniature high-performance watercraft. They typically cater to both novice and experienced builders, with varying levels of complexity and pre-fabricated parts.

Types of Mini Jet Boat Kits

The market offers a diverse range of mini jet boat kits to suit different preferences and skill levels. Some common types include:

  • Basic Kits: These kits provide the fundamental components, such as the hull, deck, and basic hardware. They require more fabrication and assembly from the builder, offering a hands-on experience for those comfortable with DIY projects.
  • Pre-Fabricated Kits: These kits include more pre-assembled components, simplifying the build process. They are ideal for those seeking a quicker and less demanding construction experience.
  • Electric Kits: Electric mini jet boat kits utilize electric motors and batteries, providing a quieter and more environmentally friendly option for boating enthusiasts. They are often favored for recreational use and pond boating.
  • Gas-Powered Kits: These kits employ gasoline engines for propulsion, delivering higher speeds and power. They are suitable for more experienced builders and those seeking performance-oriented watercraft.

Steps Involved in Building a Mini Jet Boat

Constructing your mini jet boat involves a series of well-defined steps. While the specific details may vary based on the kit and your chosen customizations, the general process remains consistent:

1. Gathering Materials and Tools

Start by carefully reviewing your kit's instructions and gathering all the necessary materials. These typically include:

  • Hull and deck components
  • Engine or electric motor
  • Jet pump and intake
  • Steering system
  • Hardware (screws, bolts, nuts, etc.)
  • Building materials (wood, fiberglass, epoxy)
  • Tools (power drill, sander, saw, etc.)

2. Hull Construction

The hull is the foundation of your mini jet boat, providing buoyancy and structural integrity. This step often involves assembling pre-fabricated hull sections or constructing the hull from scratch using fiberglass, wood, or other suitable materials. Pay close attention to the kit's instructions and ensure proper alignment and bonding.

3. Deck Assembly

The deck sits atop the hull and provides a platform for seating, controls, and storage. Depending on the kit, the deck may be pre-fabricated or require assembly from individual components. Securely fasten the deck to the hull, ensuring a watertight seal.

4. Engine Installation

Installing the engine (or electric motor) is a crucial step, requiring careful alignment and secure mounting. Refer to the kit's instructions for specific placement and mounting techniques. Ensure the engine is properly connected to the jet pump and other propulsion components.

5. Jet Pump Installation

The jet pump is responsible for converting engine power into thrust, propelling the boat forward. The installation involves aligning the pump with the engine, securing it to the hull, and connecting the intake to the hull's bottom. Ensure proper sealing and watertight connections.

6. Steering System Installation

The steering system allows you to control the direction of the boat. Install the steering wheel, cables, and linkage according to the kit's instructions. Ensure smooth operation and proper connection to the jet pump's nozzle.

7. Finishing Touches

Once the primary components are installed, you can add the finishing touches. This may include painting, adding decals, installing seating, and integrating other accessories. Take pride in your creation and personalize your mini jet boat to reflect your style.

Considerations for Building a Mini Jet Boat

Before embarking on your mini jet boat building journey, consider these key factors:

1. Skill Level

Evaluate your DIY skills and experience level. Some kits are designed for beginners, while others require a greater degree of technical expertise. Choose a kit that aligns with your abilities and comfort level.

2. Budget

Mini jet boat kits come in a range of price points. Determine your budget and choose a kit that fits within your financial constraints. Remember that additional costs may arise for tools, materials, and potential modifications.

3. Intended Use

Consider how you plan to use your mini jet boat. For leisurely cruising on calm waters, a smaller electric kit might suffice. For faster speeds and more demanding conditions, a gas-powered kit might be more suitable.

4. Safety

Prioritize safety throughout the building process. Use proper safety gear, follow instructions carefully, and seek professional help when needed. Always adhere to boating regulations and safety guidelines.

Benefits of Building Your Own Mini Jet Boat

Constructing your own mini jet boat offers a unique and rewarding experience. Here are some key benefits:

  • Customization: You have complete control over the design, features, and aesthetics of your boat.
  • Pride of Ownership: Building your own watercraft fosters a deep sense of satisfaction and accomplishment.
  • Cost Savings: Compared to buying a pre-built boat, DIY kits can offer significant cost savings.
  • Learning Experience: The construction process provides valuable hands-on experience and knowledge of boat mechanics.
  • Unique Vessel: You'll create a one-of-a-kind boat that reflects your personal style and preferences.

Building your own mini jet boat is an exciting and fulfilling endeavor. With careful planning, dedication, and the right kit, you can craft your own personalized watercraft and enjoy the thrill of cruising the open waters.

Share:

DIY Guide to Building a Homemade Duck Boat with Basic Tools

DIY Guide to Building a Homemade Duck Boat with Basic Tools

DIY Guide to Building a Homemade Duck Boat with Basic Tools

Hey there, duck enthusiasts! Ever dreamt of gliding across the serene water, your trusty duck boat by your side, ready to conquer the day? Well, stop dreaming and start building! This guide will walk you through the process of crafting your very own duck boat using basic tools. You'll be surprised how easy it is to make this versatile watercraft, perfect for hunting, fishing, or just enjoying a relaxing day on the lake.

Materials and Tools

First things first, gather your materials! You won't need a massive workshop or a million dollars to get started. Here's what you'll need:

Materials

  • Plywood: You'll need about 1/2 inch thick plywood for the boat's hull and deck. The amount will depend on the size and design of your boat.
  • Marine-grade plywood: Consider using marine-grade plywood for the boat's hull and deck if you want greater water resistance and durability.
  • 2x4 lumber: This will be used for the boat's frame, seats, and other structural elements.
  • Fiberglass cloth: This will strengthen and seal the boat's hull.
  • Epoxy resin and hardener: This will be used to bind the fiberglass cloth to the plywood and create a waterproof seal.
  • Paint: Choose a durable, water-resistant paint to protect your boat from the elements.
  • Hardware: This includes screws, bolts, nails, hinges, and any other hardware you might need to assemble your boat.
  • Rowing oars: For propelling yourself around the water.
  • Duck decoys: These are optional, but they will help you attract ducks.

Tools

  • Circular saw: For cutting the plywood and lumber.
  • Jigsaw: For cutting out curved shapes.
  • Drill: For drilling holes for screws and bolts.
  • Screwdriver: For securing the hardware.
  • Clamps: For holding pieces together while gluing or fastening.
  • Safety glasses: To protect your eyes from sawdust and flying debris.
  • Gloves: To protect your hands while working with the wood and tools.
  • Measuring tape and pencil: For making precise measurements and markings.
  • Sandpaper: For smoothing out any rough edges.

Designing Your Duck Boat

Now that you have your materials and tools ready, it's time to get creative and design your duck boat! Think about what size and shape you want your boat to be, how many people you want to fit in it, and what features you want to include.

Here are some basic design tips:

  • Keep it simple: A simple design is easier to build and will be more stable on the water.
  • Consider the size: You'll need a boat big enough to accommodate your needs but not so big that it's difficult to maneuver.
  • Think about stability: A wide base will make your boat more stable.
  • Include a flat bottom: This will make it easier to navigate in shallow water.
  • Design a pointed bow: This will help your boat cut through the water more easily.
  • Add a platform for decoys: If you plan to use decoys, include a platform for them in the design.

Building the Hull

Once you've finalized your design, it's time to start building the hull. This is the foundation of your duck boat, so it's important to do it right.

Here's a step-by-step guide:

  1. Cut out the plywood pieces: Using your design as a guide, cut out the plywood pieces for the hull. You'll need two main pieces for the sides, one piece for the bottom, and possibly smaller pieces for the bow and stern.
  2. Assemble the frame: Cut and assemble the 2x4 lumber to create a basic frame that will support the plywood hull.
  3. Attach the plywood to the frame: Secure the plywood pieces to the frame using screws or nails. Make sure to leave a slight gap between the pieces so they can flex without cracking.
  4. Add the bow and stern: Cut and attach the plywood pieces for the bow and stern, ensuring they are securely fastened to the hull.

Strengthening and Sealing the Hull

Once your hull is assembled, it's time to strengthen and waterproof it using fiberglass cloth and epoxy resin. This will make your boat much more durable and resistant to water damage.

Here's how to do it:

  1. Prepare the surface: Sand the surface of the plywood hull to remove any rough edges or splinters. Clean the surface thoroughly with a degreaser to ensure the epoxy adheres properly.
  2. Apply epoxy resin: Apply a thin layer of epoxy resin to the surface of the hull using a brush or roller. Be sure to evenly distribute the resin over the entire surface.
  3. Lay down the fiberglass cloth: Carefully lay down the fiberglass cloth over the epoxy resin, making sure it's smooth and free of wrinkles.
  4. Apply more epoxy: Apply another layer of epoxy resin over the fiberglass cloth to seal it in.
  5. Let it cure: Allow the epoxy to cure completely according to the manufacturer's instructions. This may take several hours or even days depending on the type of epoxy you used.
  6. Sand and repeat: Once the epoxy has cured, sand the surface to remove any excess resin. You can then apply additional layers of fiberglass cloth and epoxy as needed to make the hull even stronger and more durable.

Building the Deck

With the hull complete, it's time to build the deck. The deck is the top part of your boat where you'll sit, stand, and store your gear.

Here's a simple guide to building a deck:

  1. Cut and assemble the plywood: Cut out the plywood pieces for the deck, making sure they fit snugly on top of the hull. Assemble the deck using screws or nails.
  2. Add any desired features: You can add features like seating, storage compartments, or a platform for your decoys at this stage.
  3. Secure the deck to the hull: Once you're satisfied with the deck, securely fasten it to the hull using screws or bolts.

Finishing Touches

You're almost there! Once your deck is securely attached, it's time for the final finishing touches.

Here's what to do:

  1. Paint the boat: Use a durable, water-resistant paint to paint the boat. Choose a color that will make it easy to see on the water, especially during hunting season.
  2. Add any necessary hardware: Install any hardware you'll need, such as oarlocks, seats, and storage compartments.
  3. Get your gear ready: Get your hunting or fishing gear ready and pack it into your boat.

Safety First

Remember, safety is paramount when using a duck boat. Here are some essential safety tips to keep in mind:

  • Always wear a life jacket: This is crucial, especially if you're hunting or fishing in cold water.
  • Check the weather forecast before you go: Don't go out in stormy weather.
  • Let someone know where you're going and when you expect to be back: This is a vital safety precaution.
  • Be aware of your surroundings: Pay attention to the water conditions, other boaters, and any potential hazards.
  • Don't overload your boat: Make sure you don't put more weight in the boat than it can safely handle.
  • Be cautious when entering and exiting the boat: Use caution when entering or exiting your boat, especially if you're on a dock or in shallow water.

Commonly Asked Questions

Here are some frequently asked questions about building a homemade duck boat:

Q: How much does it cost to build a homemade duck boat?

A: The cost of building a homemade duck boat will vary depending on the materials and tools you use. However, it is generally more affordable than buying a pre-built boat. You can expect to spend anywhere from $100 to $500 on materials and tools.

Q: How long does it take to build a homemade duck boat?

A: The time it takes to build a homemade duck boat will depend on your experience level and the complexity of your design. A simple boat can be built in a weekend, while a more complex boat may take several weeks or even months.

Q: Do I need any special skills to build a homemade duck boat?

A: You don't need to be a professional woodworker to build a homemade duck boat. With basic woodworking skills, a little patience, and this guide, you can create a sturdy and functional boat.

Q: What are some tips for making my homemade duck boat more durable?

A: Here are a few tips for making your homemade duck boat more durable:

  • Use marine-grade plywood for the hull and deck.
  • Apply multiple layers of fiberglass cloth and epoxy resin.
  • Paint the boat with a durable, water-resistant paint.
  • Avoid using screws or nails that are too long, as they can weaken the wood.
  • Store your boat in a dry, protected location when not in use.

Now that you have a solid understanding of the process, go out there, gather your materials, and let your creativity flow! Your homemade duck boat awaits. Happy building!

Share:

How to Build a Homemade Duck Boat on a Budget

How to Build a Homemade Duck Boat on a Budget

Build Your Own Duck Boat on a Budget: A DIY Guide

Want to enjoy the thrill of hunting ducks from your own custom-built boat but don't want to break the bank? You can achieve this goal without shelling out a fortune for a factory-made duck boat. This article is your comprehensive guide to building a duck boat on a budget, offering step-by-step instructions and valuable tips to make the process enjoyable and successful.

Choosing the Right Materials

The foundation of your duck boat lies in the materials you select. You can find many options, but here are some budget-friendly choices:

Hull Construction

  • Plywood: Marine-grade plywood is a reliable and affordable choice for the hull. Opt for ½-inch thick plywood for strength.
  • Aluminum: If you're comfortable with metalworking, aluminum sheets can offer a lightweight and durable hull, though they can be more expensive than plywood.
  • PVC Pipe: For a truly budget-friendly option, consider using PVC pipes to create a buoyant frame that you can cover with a waterproof material.

Other Materials

  • Waterproof Sealant: Use a quality marine-grade sealant to ensure your boat stays watertight.
  • Paint: Choose a durable and water-resistant paint for the exterior to protect your boat from the elements.
  • Flooring: Plywood, marine-grade carpet, or even non-slip decking can be used for comfortable and safe footing.
  • Hardware: You'll need screws, bolts, hinges, and other hardware for assembling the boat.

Building the Hull

Building the hull is the most crucial step in constructing your duck boat. Start with a solid plan. Look online for free boat plans that suit your desired size and design. Remember, you can adjust these plans to fit your budget and skill level.

Once you have your plans, carefully cut the plywood or aluminum sheets to shape. Remember to leave room for overlapping edges. Use waterproof glue and screws to secure the pieces together. For aluminum, consider using rivets for a stronger bond.

Ensure all seams are tightly sealed with marine-grade sealant. You can apply a second layer of sealant to enhance water resistance. For added stability, you can add ribs or stringers inside the hull. This adds extra structural support and helps maintain the boat's shape.

Adding Deck and Seating

Once the hull is finished, you can start adding the deck and seating. Use plywood for the deck, attaching it to the hull with screws and glue. If you prefer, you can create a simple platform deck, a raised deck, or a combination of both.

Construct seats using plywood, cushions, or even camping chairs. Secure the seats to the deck for stability. You can even create a small blind for concealment on the deck by using additional plywood and camouflage netting.

Finishing Touches and Safety

After building the core structure, personalize your duck boat with a coat of paint. Choose a color that blends in with your hunting environment, such as brown, green, or camo. Add non-slip flooring to the deck for safety, especially when moving around in wet conditions.

Safety is paramount! Ensure your boat has the following:

  • Life Jackets: Equip your boat with enough life jackets for all occupants.
  • Fire Extinguisher: A portable fire extinguisher is a vital safety measure.
  • Navigation Lights: If you plan to hunt in the evenings or early mornings, make sure your boat is equipped with appropriate navigation lights.

Final Thoughts

Building your own duck boat on a budget is a rewarding experience. It combines your creativity with practical skills, resulting in a customized boat that perfectly suits your needs. With careful planning, quality materials, and a touch of DIY ingenuity, you'll have a reliable and cost-effective duck boat that's ready for countless hunting adventures.

Share:

Step-by-Step Instructions for Building a Wooden Rowboat

Step-by-Step Instructions for Building a Wooden Rowboat

Building a Wooden Rowboat: A Step-by-Step Guide

Building a wooden rowboat is a rewarding and challenging project that can be enjoyed by skilled woodworkers. This comprehensive guide will walk you through the entire process, from selecting the right materials to launching your finished masterpiece. With patience, precision, and a little elbow grease, you can create a beautiful and functional rowboat that will provide years of enjoyment on the water.

1. Planning and Design

Before you start cutting wood, it's crucial to have a solid plan. This includes determining the size, shape, and features of your rowboat.

1.1 Choosing the Right Design

There are countless rowboat designs available, from classic dories to sleek racing shells. Consider your intended use, skill level, and desired aesthetics when selecting a design. Research various options and choose one that aligns with your goals and capabilities.

1.2 Material Selection

The choice of wood plays a significant role in the strength, durability, and overall character of your rowboat. Some popular choices include:

  • Cedar: Known for its lightweight, rot-resistant qualities and beautiful grain.
  • Oak: Offers exceptional strength and durability, but can be heavier.
  • Mahogany: Renowned for its rich color and stunning grain patterns.
  • Pine: Affordable and easy to work with, but may require additional treatments for water resistance.

1.3 Gathering Tools and Equipment

Before starting construction, ensure you have the necessary tools and equipment, including:

  • Hand saws: For cutting wood to size.
  • Planers: To smooth and flatten wood surfaces.
  • Chisels and mallets: For shaping and joining wood.
  • Clamps: For securing wood during assembly.
  • Sandpaper: For smoothing and finishing the boat's surface.
  • Measuring tapes and rulers: For precise measurements.
  • Safety gear: Including gloves, goggles, and dust masks.

2. Building the Hull

The hull is the foundation of your rowboat, and constructing it requires careful attention to detail and precision.

2.1 Cutting and Shaping the Planks

Using your chosen design plans, cut and shape the planks that will form the hull. Follow the plans meticulously, ensuring each plank is cut to the correct length and curvature.

2.2 Joining the Planks

Once the planks are ready, use traditional boatbuilding techniques like carvel or lapstrake construction to join them together. This process involves carefully fitting and fastening the planks, creating a watertight hull. Use marine-grade epoxy and fasteners to ensure a strong and durable bond.

2.3 Adding Ribs and Frames

To provide structural support and define the boat's shape, ribs and frames are added to the hull. These components are carefully positioned and attached to the planks, creating a robust framework.

2.4 Creating the Keel and Stem

The keel runs along the center of the boat's bottom, providing stability and strength. The stem, located at the bow, is another essential structural element. These components are carefully shaped and attached to the hull, completing the primary structure.

3. Finishing Touches

Once the hull is built, it's time to add the finishing touches that will make your rowboat truly unique.

3.1 Installing the Seats and Oars

Select comfortable and durable seats that fit your rowboat design. Attach them securely to the hull and ensure they are positioned correctly for efficient rowing. Install the oarlocks, which serve as the pivot points for the oars.

3.2 Adding the Thwarts

Thwarts are crosspieces that provide additional support and bracing for the hull. Install them according to your design plans, ensuring they are securely fastened and properly aligned.

3.3 Finishing the Surface

Sand the entire surface of the rowboat thoroughly to create a smooth finish. This step prepares the wood for painting or varnishing, enhancing its appearance and protecting it from the elements.

3.4 Applying Paint or Varnish

Choose a marine-grade paint or varnish that offers durability and resistance to water and UV rays. Apply multiple coats, allowing each layer to dry completely before applying the next. This creates a protective barrier for the wood, extending its lifespan and preserving its beauty.

4. Launching Your Rowboat

The final step is launching your rowboat and enjoying the fruits of your labor. Carefully carry your rowboat to the water's edge and gently slide it into the water.

As you row your new creation, take pride in the craftsmanship and hard work that went into its creation. Enjoy the serene experience of being on the water, propelled by your own strength and skill.

Share:

Recent Posts

Theme Support