Wooden Rowboat Plans for a Multi-Purpose Recreational Boat

Wooden Rowboat Plans for a Multi-Purpose Recreational Boat

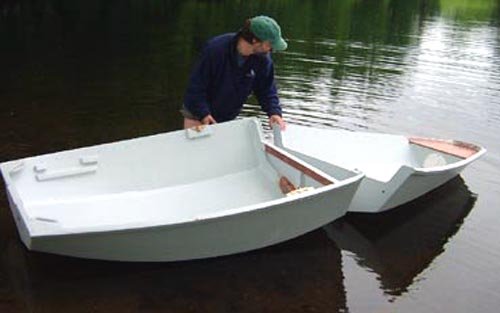
Wooden Rowboat Plans: Your Gateway to Lakeside Adventures

Imagine yourself gliding across a serene lake, the gentle rhythm of your oars propelling you through the water. The scent of pine fills the air as you navigate tranquil coves, casting a line for the catch of the day. This idyllic scene is within your reach with a handcrafted wooden rowboat, built from plans designed to meet your needs. Whether you're a seasoned boatbuilder or just starting your journey, the satisfaction of creating your own vessel is unmatched.

Unleashing the Possibilities of Wooden Rowboat Plans

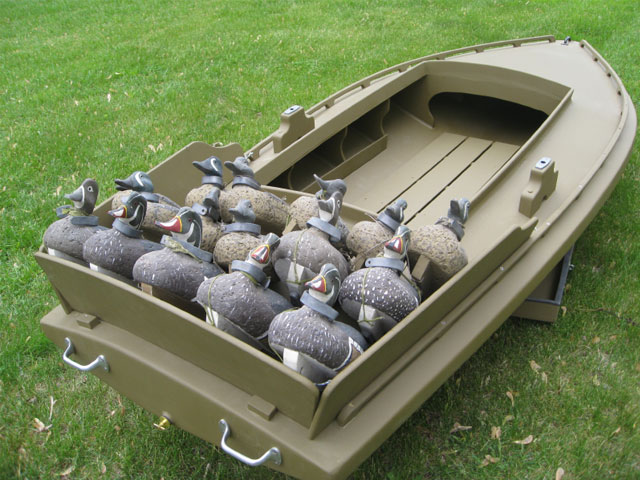
Wooden rowboat plans offer a universe of design options to fit your specific needs and desires. This versatility allows you to tailor your boat for fishing, leisurely paddling, or even competitive rowing. With a wide range of styles available, including classic designs like the Whitehall, the clinker-built, and the lapstrake, you can choose the perfect silhouette to reflect your personal taste and intended use.

The Benefits of Choosing Wooden Rowboat Plans

The beauty of wooden rowboats goes beyond aesthetics. Here are some key benefits that make them a compelling choice:

Craftsmanship and Tradition

Building a boat from scratch is a rewarding experience that connects you to a rich maritime history. Each plank, each joint, and each stroke of varnish becomes a testament to your skill and dedication. The timeless elegance of woodcraft adds a touch of nostalgia to your time on the water.

Durability and Longevity

Properly maintained wooden rowboats can last for generations, becoming treasured heirlooms. The natural resilience of wood, combined with the meticulous craftsmanship involved, ensures a vessel that can withstand the test of time and the elements.

Versatility and Customization

Wooden rowboat plans provide a blank canvas for personalization. You can choose the dimensions, seating arrangements, and features to best suit your needs. From adding a comfortable bench to installing a fish-finder, the possibilities are limitless.

Finding the Right Wooden Rowboat Plans for You

The internet is a treasure trove of resources for finding detailed and comprehensive wooden rowboat plans. Look for reputable sources that offer clear instructions, detailed diagrams, and perhaps even video tutorials. Here are some key factors to consider when choosing your plans:

  • Boat Length and Width: Determine the size that best suits your intended use and the body of water you'll be navigating.
  • Rowing Style: Choose plans that cater to your desired rowing technique, whether it's sculling or sweep rowing.
  • Construction Complexity: Select plans that align with your skill level and experience. Start with simpler designs and gradually move towards more intricate projects.
  • Wood Species: Consider the availability and characteristics of different wood species to determine the best material for your boat.

Embrace the Adventure: Build Your Wooden Rowboat Today

The journey of building a wooden rowboat is an exciting adventure. It's a journey of learning, skill development, and personal satisfaction. With the right plans and a little dedication, you can create a lasting legacy on the water, one stroke at a time. So, dive into the world of wooden rowboat plans and embark on the journey of crafting your own masterpiece.

Share:

Affordable and Functional Homemade Duck Boat Plans for DIYers

Affordable and Functional Homemade Duck Boat Plans for DIYers

Building Your Own Duck Boat: A DIY Guide to Affordable Fun

Have you ever dreamed of cruising the lake, silently watching ducks bob and weave in the water? Or maybe you just want a fun, affordable way to get out on the water and enjoy nature? Building your own duck boat is a great way to achieve both!

A duck boat, also known as a "puddle duck" or "marsh duck," is a small, flat-bottomed boat designed for hunting ducks. But, don't let the hunting aspect scare you off! You can use your duck boat for all sorts of fun activities like fishing, bird watching, or just paddling around on a beautiful day.

The best part? Building your own duck boat doesn't have to be complicated or expensive. You can find all the materials you need at your local hardware store, and the instructions are surprisingly simple.

So grab your tools, put on your favorite work clothes, and let's get started!

Materials You'll Need

Here’s a list of materials you'll need to build your own duck boat. The exact quantities will depend on the size and design of your boat, so be sure to adjust the quantities as needed.

  • Plywood (1/2" or 3/4" thick) for the bottom, sides, and deck
  • Marine plywood (for areas that will be exposed to water)
  • 2x4 lumber for the frame
  • Fiberglass cloth (for sealing the boat and making it waterproof)
  • Epoxy resin (for laminating the fiberglass cloth)
  • Paint (for protecting the wood and giving your boat a great look)
  • Screws (various sizes for attaching the wood and frame)
  • Fasteners (like nuts, bolts, and washers)
  • Oars or motor (depending on how you want to propel your boat)
  • Duck blind (optional, if you want to hunt ducks)

Step-by-Step Instructions

Okay, let’s get down to business! Follow these steps to build your own duck boat.

1. Design Your Boat

First, you’ll need to decide on the size and shape of your duck boat. You can find free plans online or even draw your own design! Consider what you'll be using the boat for and how many people you want it to carry.

Here are a few things to keep in mind when designing your duck boat:

  • Length: Duck boats typically range from 8 to 14 feet long.
  • Width: A good width is around 3 to 4 feet.
  • Depth: The depth should be enough to keep you and your gear dry, but not so deep that it's difficult to paddle.
  • Stability: Make sure the boat has a wide enough beam and a low center of gravity to be stable in the water.
  • Portability: If you're going to be carrying your boat, make sure it's lightweight enough for you to handle.

2. Build the Frame

Next, build the frame of your boat using the 2x4 lumber. You'll need to cut the lumber to the exact sizes specified in your plans. Use screws or nails to attach the pieces of wood together, creating a strong and rigid frame.

Make sure the frame is square and level, and that all the joints are securely fastened.

3. Add the Bottom

Once you've built the frame, it's time to attach the bottom of your boat. Cut the plywood to the exact size and shape you need. Use screws or nails to fasten the bottom plywood to the frame.

4. Attach the Sides

Now it's time to add the sides of your boat. Cut the plywood to the correct size and shape, and attach it to the frame using screws or nails. Use wood glue for added strength.

5. Build the Deck (Optional)

If you want a deck on your boat, build it using more plywood. Cut and attach the deck boards to the frame and sides. You can create a flat deck, or even add a small platform for fishing.

6. Seal and Waterproof Your Boat

This is a crucial step! To ensure your boat is completely sealed and waterproof, you'll need to use fiberglass cloth and epoxy resin. This process will create a strong, durable, and waterproof shell for your boat.

Here's how to do it:

  • Clean the boat: Wipe down the entire boat with a damp cloth to remove dirt and debris.
  • Apply the epoxy resin: Use a brush or roller to apply a layer of epoxy resin over the entire surface of your boat, both inside and out.
  • Lay down the fiberglass cloth: Carefully lay the fiberglass cloth over the wet resin, making sure it's smooth and free of wrinkles.
  • Apply more epoxy resin: Apply another layer of epoxy resin over the fiberglass cloth, making sure it soaks completely into the cloth.
  • Repeat steps 3 and 4: Repeat this process of applying epoxy resin and laying down fiberglass cloth until you have a strong and durable layer.

It might seem like a tedious process, but it's the best way to create a waterproof and long-lasting boat!

7. Add Finishing Touches

Once the epoxy resin has cured, you can sand and paint your boat to give it a finished look. You can use any color you like, but it’s a good idea to choose a color that will help camouflage your boat in the water.

Add oars or a motor, depending on how you want to propel your boat.

Safety Tips

Building your own boat is a great way to save money and have fun, but always remember safety is paramount. Here are a few safety tips to keep in mind when building and using your duck boat:

  • Wear safety glasses and gloves when working with power tools and epoxy resin.
  • Follow all instructions carefully when using power tools and working with chemicals.
  • Use a life jacket every time you're on the water.
  • Always check the weather forecast before going out on the water.
  • Let someone know where you're going and when you expect to return.
  • Avoid boating alone, if possible.

Commonly Asked Questions

Here are some of the most frequently asked questions about building a duck boat:

Q: What kind of wood should I use for my duck boat?

A: The best choice for a duck boat is marine-grade plywood. It’s specifically designed to withstand water and moisture, making it ideal for boat building. You can also use regular plywood for the less-exposed areas, but you’ll want to seal it properly with epoxy and paint.

Q: How much does it cost to build a duck boat?

A: The cost of building a duck boat varies depending on the size and materials used. However, you can usually build a duck boat for under $500. That’s a significant saving compared to buying a ready-made boat.

Q: What are some tips for painting my duck boat?

A: Choose a durable, water-resistant paint. You can use a primer to help the paint adhere to the epoxy resin. Apply multiple thin coats of paint instead of one thick coat for the best results.

Q: What if I don't have any woodworking experience?

A: Don't worry! Building a duck boat is a great way to learn some basic woodworking skills. There are plenty of resources available online and in libraries that can guide you through the process. And, you can always ask for help from a friend or family member who is more experienced with woodworking.

Building your own duck boat can be a rewarding and fun experience! You'll have a custom-made boat that you can take pride in, and you'll be able to enjoy the water in a whole new way. So, get out there, gather your materials, and start building your own duck boat today!

Share:

How to Build a Wooden Dinghy: Complete Guide

How to Build a Wooden Dinghy: Complete Guide

Building a Wooden Dinghy: A Complete Guide for Beginners

Hey there, fellow boat enthusiasts! Are you dreaming of gliding across the water in your very own handcrafted wooden dinghy? Building a wooden dinghy is a rewarding and challenging project that can bring you immense satisfaction. It's a chance to reconnect with traditional boatbuilding techniques, create a unique and beautiful vessel, and enjoy the joy of sailing your very own creation. This guide will walk you through the entire process, step by step, making it accessible even for first-time boat builders.

Getting Started: Planning Your Dinghy

Before you dive into the exciting world of boat building, it's crucial to have a solid plan in place. The first step is to choose the right design for your dinghy.

Choosing the Right Dinghy Design

There are countless dinghy designs available, from classic clinker-built boats to modern plywood designs. Consider these factors when making your choice:

  • Intended Use: Will you be using your dinghy for rowing, sailing, or both?
  • Size: How many people and how much gear will you be carrying?
  • Skill Level: Are you a beginner or more experienced boat builder? Some designs are simpler than others.
  • Available Resources: Do you have access to woodworking tools and materials?

If you're new to boatbuilding, consider starting with a simple, well-documented plan. There are plenty of free dinghy plans available online, or you can purchase detailed plans from reputable boatbuilding suppliers.

Gathering Materials and Tools

Once you have your design, it's time to gather the necessary materials. This includes:

  • Wood: Select high-quality marine plywood or sawn lumber for the hull, decks, and frames.
  • Fasteners: Marine-grade screws, bolts, and rivets for secure construction.
  • Epoxy Resin and Hardener: For bonding wood and sealing seams.
  • Fiberglass Cloth: For reinforcing the hull and adding strength.
  • Paint and Varnish: For protecting and beautifying your dinghy.

You'll also need a range of woodworking tools, including:

  • Hand saws and power saws: For cutting wood to size.
  • Planer and sander: For smoothing and shaping wood.
  • Drill and screwdriver: For drilling and fastening.
  • Clamps: For holding parts together during assembly.

Building the Hull

Now, the fun part begins! Building the hull is the core of your dinghy.

Step 1: Cutting and Shaping the Planks

Carefully cut the planks according to the plan, ensuring precise measurements. Use a jigsaw or bandsaw for curved sections. Use a plane or sander to smooth the edges and create a consistent thickness.

Step 2: Assembling the Frames

Follow the plan to construct the frames, which provide the structural support for the hull. Join the frame pieces using mortise and tenon joints, scarf joints, or other traditional techniques. Make sure the frames are square and level.

Step 3: Attaching the Planks to the Frames

Start attaching the planks to the frames, one at a time. Use clamps to hold the planks in place while applying epoxy resin and fasteners. Pay close attention to the plan to ensure accurate spacing and alignment.

Step 4: Adding Stiffeners

Strengthen the hull by adding stiffeners, which are small pieces of wood that run along the length of the hull. These help prevent flexing and warping.

Step 5: Fiberglassing and Finishing

After the hull is completely assembled, sand it smooth. Apply several layers of epoxy resin and fiberglass cloth to reinforce the hull and create a watertight seal. Let each layer cure thoroughly before applying the next.

Building the Deck and Other Components

Once the hull is finished, it's time to build the deck, seats, transom, and other components.

Step 1: Constructing the Deck

Cut and shape the plywood for the deck, following the plans. Attach the deck to the hull using epoxy resin and fasteners. Add any necessary supports or stringers for strength.

Step 2: Building the Seats and Transom

Construct the seats and transom using wood and fasteners. Make sure the seats are comfortable and securely attached. The transom needs to be strong enough to support the outboard motor (if you plan to use one).

Step 3: Adding Finishing Touches

Sand the entire dinghy smooth and apply paint or varnish to protect the wood and add a beautiful finish. Consider adding details like oarlocks, rowlocks, or a bowsprit.

Launching Your New Dinghy

Congratulations! You've built your own wooden dinghy.

Step 1: Final Checks

Before launching, do a final inspection to ensure everything is secure. Check all the fastenings, seams, and paintwork. Make sure your oars or paddles are in good condition.

Step 2: The First Launch

Choose a calm day to launch your new dinghy for the first time. Ease it gently into the water and enjoy your handcrafted masterpiece.

Step 3: Enjoy Your Dinghy

Your wooden dinghy is ready for adventure! Take it out rowing, sailing, or fishing. Enjoy the peace and tranquility of being on the water in your very own custom-built boat.

Commonly Asked Questions

Here are some common questions about building a wooden dinghy:

  • How long does it take to build a wooden dinghy? The time required depends on the size and complexity of the design. It can take anywhere from a few weeks to several months.
  • How much does it cost to build a wooden dinghy? The cost varies depending on the materials and tools you use. It's generally cheaper than buying a new dinghy, but it requires a significant investment in time and effort.
  • What are the challenges of building a wooden dinghy? Building a boat requires patience, precision, and attention to detail. You need to be comfortable working with wood and using woodworking tools.
  • What are the benefits of building a wooden dinghy? The satisfaction of building your own boat is unmatched. You get to create a unique and beautiful vessel that you can enjoy for years to come.

Building a wooden dinghy is a rewarding journey that will teach you valuable skills and create lasting memories. So, grab your tools, gather your materials, and embark on this exciting adventure!

Share:

Fishing Boat Plans for Classic Wooden Designs and Comfort

Fishing Boat Plans for Classic Wooden Designs and Comfort

Classic Wooden Fishing Boat Plans: Where Tradition Meets Modern Comfort

There’s a certain charm to a classic wooden fishing boat. Its timeless design, the gentle creak of its hull, and the smell of fresh wood evoke a sense of nostalgia and connection to a bygone era. But it’s not just about aesthetics. These boats, with their sturdy construction and seaworthy qualities, were built to endure the rigors of fishing life. Today, skilled boatbuilders and enthusiasts continue to honor this tradition, crafting beautiful and functional wooden fishing boats, blending classic design with modern comforts.

Choosing the Right Plan: A Journey of Discovery

Before you dive into the world of wooden boatbuilding, it’s crucial to select the right plan. This isn’t just about picking a design you like; it’s about finding a plan that matches your skills, resources, and intended use. Do you envision a sleek and nimble dory for inshore fishing, or a larger, more robust lobster boat for venturing further out?

Factors to Consider:

  • Length and Beam: Determine the boat's overall size, considering its intended use and your budget.
  • Draft: Choose a suitable draft for the waters you’ll be fishing in, whether it’s shallow inshore or deeper offshore waters.
  • Hull Shape and Construction: Explore different hull designs and their advantages: traditional carvel, lapstrake, or strip planking.
  • Power and Rigging: Decide on the type of engine and rigging that best suits your needs, considering fuel efficiency and performance.

Classic Wooden Fishing Boat Designs:

The world of classic wooden fishing boat designs offers a diverse array of options, each with its own unique character and history. Explore these iconic styles:

Dory:

The dory, with its distinctive shallow hull and wide beam, is known for its stability and seaworthiness. It's a versatile option for inshore fishing and can be rowed or powered by a small outboard motor.

Lobster Boat:

Lobster boats, with their sturdy construction and powerful engines, are designed for venturing into rougher waters. They feature a distinctive flared bow and a deep hull, providing stability and capacity.

Skiff:

Skiffs, known for their simplicity and versatility, are popular for fishing, exploring, and general coastal use. They're often smaller in size, making them suitable for navigating shallow waters.

Modern Comforts for a Classic Experience:

While classic designs are essential, today’s boatbuilders incorporate modern comforts to enhance the fishing experience. These upgrades include:

  • Ergonomic Seating and Console: Comfortable, adjustable seating and well-designed consoles enhance the time spent on the water.
  • Navigation Electronics: Modern GPS, sonar, and chartplotters provide essential navigation tools for safe and efficient fishing.
  • Fishing Amenities: Rod holders, live wells, and bait storage systems optimize the fishing process.
  • Cabin Features: Larger boats may offer cozy cabins with sleeping accommodations, a galley, and head.

Building Your Dream Boat: A Labor of Love

Building a wooden fishing boat is a labor of love. It's a journey that combines craftsmanship, patience, and a deep appreciation for the sea. With careful planning, meticulous execution, and a dedication to detail, you can create a boat that will provide years of joy on the water.

Remember, while classic designs remain timeless, modern comforts enhance the overall fishing experience. Whether you’re a seasoned boatbuilder or a beginner eager to learn, the world of wooden fishing boats offers a rewarding and fulfilling adventure.

Share:

Wood Boat Plans for Building a Beautiful Wooden Kayak

Wood Boat Plans for Building a Beautiful Wooden Kayak

Carve Your Own Adventure: Building a Beautiful Wooden Kayak

There's a certain magic in crafting a wooden kayak with your own hands. The scent of cedar, the smooth curve of the hull, and the anticipation of your first paddle stroke â€" it's an experience that resonates with the soul of the water. Building a wooden kayak isn't just about creating a vessel; it's about embarking on a journey of craftsmanship, patience, and connection with nature.

The internet is a treasure trove of free wood boat plans, offering a variety of designs suitable for beginners and experienced builders alike. However, before diving into the world of wooden boat plans, it's essential to consider a few factors that will shape your journey.

Choosing the Right Wood Boat Plans

Experience Level

If you're a novice woodworker, starting with a simple design is key. Look for plans that provide detailed instructions, clear diagrams, and a manageable scope of work. Many plans are categorized by skill level, allowing you to choose one that aligns with your comfort zone.

Kayak Style

Do you envision yourself gliding gracefully on calm lakes or braving the rapids? Different kayak styles cater to various paddling experiences. Touring kayaks offer stability and long-distance capabilities, while whitewater kayaks are designed for maneuverability and excitement. Consider your intended use and choose a plan that matches your paddling aspirations.

Materials

Wood boat plans often specify recommended materials. While some plans might use readily available woods like cedar or pine, others might call for more exotic options. Research the availability and cost of the suggested woods before finalizing your choice.

Essential Tools for Wooden Kayak Construction

Building a wooden kayak requires a toolbox filled with essential tools. Some tools you'll need include:

  • Hand saw or power saw
  • Planes
  • Chisels
  • Sandpaper
  • Clamps
  • Measuring tools (ruler, tape measure, protractor)
  • Safety equipment (goggles, gloves, respirator)

Navigating the World of Wooden Boat Plans

The internet offers a wealth of free and paid wooden boat plans, catering to various skill levels and styles. Here are a few reputable sources:

  • WoodenBoat.com: A website dedicated to wooden boat building, offering articles, forums, and a collection of free plans.
  • The Wooden Boat Shop: A website with a diverse range of plans, including a dedicated section for kayak designs.
  • Boat Plans USA: A site offering a selection of kayak plans, some free and some paid.

Remember, choosing the right wood boat plan is crucial for a successful build. Carefully review the plan, assess your skills, and consider the available materials. With the right plan and dedication, you'll be well on your way to crafting a beautiful and functional wooden kayak that will carry you on countless adventures.

Share:

Custom Mini Jet Boat Design Ideas for DIY Builders

Custom Mini Jet Boat Design Ideas for DIY Builders

Custom Mini Jet Boat Design Ideas for DIY Builders

Hey there, fellow boat enthusiasts! Are you tired of the same old boring boats? Do you crave the thrill of zipping across the water with the wind in your hair? Then maybe it's time to embark on a DIY project and build your very own mini jet boat! It's a challenging and rewarding experience, and you'll have a blast seeing your creation come to life. Let's dive into some design ideas that'll get your creative juices flowing.

Choosing the Right Hull

The foundation of your jet boat is the hull, and it plays a crucial role in determining the boat's performance and stability. Here are a few popular options to consider:

Pontoon Hulls

Pontoon hulls are known for their stability and buoyancy, making them an excellent choice for beginners. They're generally wider and flatter than other hull types, providing ample space for passengers and gear. Plus, pontoon hulls are typically made from aluminum or fiberglass, which are relatively easy to work with.

V-Hulls

V-hulls are designed to slice through the water, offering excellent speed and maneuverability. They're ideal for experienced DIY builders who are comfortable with more complex designs. Keep in mind that V-hulls tend to be less stable than pontoon hulls, especially at lower speeds.

Catamaran Hulls

Catamaran hulls feature two parallel pontoons, offering superior stability and a wider platform for passengers and gear. They're a great option for those who want a more spacious and balanced boat.

Jet Drive Selection

The jet drive is the heart and soul of your mini jet boat, powering it through the water with impressive efficiency. You have several options when choosing a jet drive:

Outboard Jet Drives

Outboard jet drives are a popular choice for mini jet boats, offering a compact and easily-installed solution. They're generally more affordable than inboard jet drives, and they can be easily removed for maintenance or storage.

Inboard Jet Drives

Inboard jet drives are a more complex but powerful option. They're typically found on larger boats but are becoming increasingly popular for DIY mini jet boat projects. Inboard jet drives provide superior performance and maneuverability but require a more substantial investment.

Powerplant Considerations

Choosing the right powerplant for your mini jet boat is crucial for determining its performance and efficiency. Here are some popular options:

Gasoline Outboard Motors

Gasoline outboard motors are a reliable and affordable choice for mini jet boats. They offer a good balance of power and fuel efficiency. Keep in mind that outboard motors require regular maintenance and can be bulky to transport.

Electric Motors

Electric motors are becoming increasingly popular in the boating world, offering clean, quiet, and efficient operation. They're a great option for environmentally conscious builders. However, electric motors can be more expensive than gasoline engines, and their range is limited by battery capacity.

Essential Features and Design Elements

Beyond the basics, here are some important design elements to consider when building your custom mini jet boat:

Steering System

A reliable steering system is crucial for controlling your boat. You can opt for a simple tiller steering system, or you can go for a more sophisticated wheel steering system. Consider the size and weight of the boat when selecting the appropriate steering system.

Seating and Layout

Think about the seating arrangement and layout of your boat based on your intended use. Will you be taking passengers? Do you need storage space for gear? Design the seating to be comfortable and secure, and plan for ample storage for your essentials.

Safety Features

Safety should always be top of mind. Ensure your mini jet boat has the necessary safety features, such as a fire extinguisher, life jackets, and a bilge pump. Include a kill switch connected to the operator's life jacket for added safety.

Finishing Touches

Don't forget about the finishing touches that will make your mini jet boat truly unique. Consider adding custom paint, decals, and upholstery to personalize your creation and reflect your style.

DIY Construction Tips

Building a custom mini jet boat requires a good understanding of boat construction techniques. Here are some tips for a smooth and successful project:

  • Research Thoroughly: Before starting, gather as much information as possible about boat building techniques, materials, and safety regulations. Online resources, boat building forums, and local boat builders can provide valuable insights.
  • Plan Ahead: Create a detailed plan that outlines every step of the construction process, including material requirements, tools, and budget. This will help you stay organized and avoid unexpected delays.
  • Use High-Quality Materials: Invest in quality materials for a durable and reliable boat. This includes marine-grade plywood, fiberglass, epoxy resin, and hardware.
  • Work in a Safe Environment: Make sure you have a safe and well-ventilated workspace for your project. Wear appropriate safety gear, such as goggles, gloves, and a respirator, when working with chemicals.
  • Seek Expert Advice: If you're new to boat building, don't hesitate to seek advice from experienced boat builders. Consider attending boat building workshops or classes for hands-on guidance.
  • Take Your Time: Boat building requires patience and precision. Don't rush the process, and make sure each step is done correctly. This will ensure the quality and durability of your boat.

Commonly Asked Questions

Here are some frequently asked questions about DIY mini jet boat design:

Q: How much does it cost to build a mini jet boat?

The cost of building a mini jet boat can vary depending on factors like the size and complexity of the design, the materials used, and the cost of labor. You can expect to spend anywhere from a few thousand dollars to several thousand dollars on your project.

Q: What are the legal requirements for operating a mini jet boat?

Legal requirements for operating a jet boat vary depending on your location. It's essential to research the specific laws and regulations in your area, including licensing, registration, and safety requirements.

Q: Is it safe to build a mini jet boat by yourself?

Building a boat requires a high level of skill and expertise. If you're a beginner, it's advisable to work with an experienced boat builder or take a course to learn the proper techniques and safety precautions.

Q: Where can I find plans for building a mini jet boat?

You can find plans for building mini jet boats online, at boat building supply stores, or in boat building magazines. Consider purchasing plans from reputable sources to ensure accuracy and completeness.

Building a custom mini jet boat is an exciting and rewarding project, but it's important to be prepared and to approach it with caution. By following these design ideas and DIY tips, you can embark on a journey that'll lead you to the thrill of navigating the waters in your very own creation. Happy building!

Share:

How to Build a Stable and Quiet Homemade Duck Boat for Hunting

How to Build a Stable and Quiet Homemade Duck Boat for Hunting

Building Your Own Duck Hunting Boat: A Guide to Stability and Quiet

Duck hunting can be an incredibly rewarding experience, but getting to the perfect hunting spot can be a challenge. That's where a good duck boat comes in. While you can buy a ready-made boat, there's something incredibly satisfying about building your own, especially one tailored to your needs. This guide will help you build a stable and quiet duck boat that will get you where you need to be and keep you comfortable while you wait for that perfect shot.

Choosing the Right Materials for Your Duck Boat

The first step is to choose the right materials. You want something that is strong, durable, and quiet. Here are some popular options:

Plywood

Marine-grade plywood is a classic choice for building duck boats. It’s strong, water-resistant, and relatively affordable. You'll want to use at least 3/4" thick plywood for maximum durability.

Aluminum

Aluminum is another good option. It's light, corrosion-resistant, and very durable. The downside is it can be more expensive than plywood.

Fiberglass

Fiberglass is the most durable option, but it’s also the most complex to work with. You'll need to be comfortable with fiberglassing techniques if you go this route.

Choosing the Right Design

There are many different duck boat designs, so choose one that suits your hunting style and the waterways you plan to use. Here are a few things to consider when selecting a design:

  • Size: How many hunters will be in the boat? Will you be carrying a lot of gear? A bigger boat will be more stable, but it will be harder to maneuver in shallow water.
  • Shape: A flat-bottomed boat is good for shallow water, while a V-shaped hull is better for choppy water.
  • Draft: The draft is the depth of the boat in the water. You'll want a shallow draft if you plan to hunt in areas with lots of shallow water.

Building the Boat

Once you've chosen your materials and design, it's time to start building. Here are some tips for building a stable and quiet duck boat:

Frame Construction

If you're using plywood, you'll need to build a frame for the boat. This will provide the support for the plywood and give the boat its shape. You can use lumber for the frame, but be sure to use marine-grade lumber to prevent rot. Use epoxy and screws to securely fasten the frame together.

Adding Ribs

Once the frame is complete, you'll need to add ribs to give the boat its shape. Ribs are strips of wood or aluminum that run from the bottom of the boat to the sides. They provide strength and support for the hull. Use a good quality wood glue and screws to attach the ribs to the frame.

Covering the Hull

Now it's time to cover the hull with your chosen material. If using plywood, be sure to use marine-grade plywood and seal all the edges and seams with epoxy or marine-grade sealant to prevent water penetration. If using fiberglass, apply the fiberglass layers carefully and follow the manufacturer's instructions. Be sure to let each layer of fiberglass cure thoroughly before applying the next.

Building the Deck

The deck is the platform you stand on while hunting. If you are building a deck, use plywood or aluminum and attach it to the frame.

Adding Seats

You'll need comfortable and durable seats for hunting. You can use boat seats or even build your own out of wood. Be sure to attach them securely to the deck.

Making Your Boat Quiet

One of the key things to remember when duck hunting is staying quiet. Ducks can hear incredibly well, so any noise can scare them away. Here are a few tips to make your boat quieter:

Choosing Quiet Materials

Use materials that are naturally quiet, like plywood, rubber, and foam. Avoid using metal components that can clink and clang.

Covering Noisy Surfaces

Cover any metal components with rubber or foam. Use carpeting or a non-slip material on the deck to muffle footfalls.

Attaching a Motor Quietly

If you're using a motor, be sure to mount it securely and use rubber mounts to reduce vibration.

Adding Features

Once the basic boat is built, you can add features to make it more functional and comfortable. Here are a few ideas:

  • Storage compartments: Add storage compartments to keep your gear organized. These can be built into the deck or under the seats.
  • Rod holders: If you plan to fish while duck hunting, add rod holders to the sides of the boat.
  • Gun racks: Gun racks will keep your guns secure and out of the way.
  • Blind: If you plan to hunt from a blind, you can build one into the boat or purchase a separate blind to attach to the deck.

Finishing Touches

Once the boat is built, you'll need to give it some finishing touches.

Painting

Paint the boat with a durable, weather-resistant paint. Consider using camouflage paint to blend in with your surroundings.

Sealing

Seal all the seams and joints with epoxy or a marine-grade sealant. This will help to prevent leaks and keep the boat watertight.

Testing and Troubleshooting

Before you take your new boat out for a hunt, be sure to test it out on a calm day in a controlled environment. Check for any leaks, and make sure that all the components are securely attached.

Commonly Asked Questions

How much does it cost to build a duck boat?

The cost of building a duck boat can vary depending on the materials you use and the features you add. You can expect to spend anywhere from a few hundred dollars to several thousand dollars.

How long does it take to build a duck boat?

The time it takes to build a duck boat depends on your skill level and the complexity of the design. A simple duck boat can be built in a few weekends, while a more complex boat can take several months.

Do I need any special tools to build a duck boat?

You'll need some basic woodworking tools, such as a saw, a drill, and a sander. If you're using fiberglass, you'll also need some specialized tools, such as a fiberglass roller and a respirator.

What are the best places to find duck boat plans?

You can find duck boat plans online, in books, and at woodworking stores. Many boat building magazines also offer plans for duck boats.

Building your own duck boat can be a rewarding project, and it's a great way to customize a boat to meet your needs. By following the tips in this guide, you can build a stable, quiet, and durable boat that will help you have a successful duck hunting season.

Share:

How to Build a Wooden Sailboat with Detailed Free Plans

How to Build a Wooden Sailboat with Detailed Free Plans

Building a Wooden Sailboat: A Comprehensive Guide

Embarking on the journey of building a wooden sailboat is a rewarding experience that combines craftsmanship, artistry, and a deep connection with the sea. From meticulously selecting materials to carefully crafting each piece, this process allows you to create a truly unique and personal vessel. This comprehensive guide will lead you through the steps, providing detailed instructions and free plans to help you realize your dream of building your own sailboat.

Choosing the Right Design and Plans

Before diving into the construction, selecting the appropriate design and plans is crucial. Consider your experience level, desired size, and sailing style.

Experience Level:

  • Beginner: Opt for a simpler design, like a dinghy or small day sailer. These designs often feature fewer complex curves and joinery.
  • Intermediate: Explore designs with more intricate details, like a classic daysailer or a small cruising sailboat.
  • Advanced: If you possess extensive woodworking experience, you can tackle ambitious projects like a larger cruiser or a performance sailboat.

Size and Type of Sailboat:

  • Dinghy: These small, open sailboats are ideal for recreational use, sailing in sheltered waters, and learning basic sailing skills.
  • Daysailer: Perfect for day trips and leisurely sailing, these sailboats offer some cabin space for storage and comfort.
  • Cruising Sailboat: Designed for extended voyages, these sailboats provide more living space, amenities, and seaworthiness.

Free Plans:

Numerous resources offer free sailboat plans online. Here are some reputable websites where you can find suitable designs:

Remember to carefully review the plans, specifications, and construction details before making your decision.

Gathering Materials and Tools

Once you've chosen your design, it's time to gather the essential materials and tools. This includes:

Wood:

  • Marine Plywood: A durable and water-resistant material for the hull, deck, and bulkheads. Look for plywood with a high-quality marine-grade epoxy coating.
  • Cedar, Mahogany, or Teak: These hardwoods offer strength, durability, and aesthetic appeal for structural components like frames, spars, and decking.
  • Oak or Ash: These woods provide excellent strength and stiffness for spars and rudders.

Fasteners:

  • Copper Fasteners: Resistant to corrosion and ideal for securing structural components.
  • Stainless Steel Fasteners: Durable and corrosion-resistant for exterior applications.
  • Marine-grade Epoxy Resin and Hardener: Provides waterproofing and structural bonding for the hull and deck.

Tools:

  • Hand Tools: Saws, chisels, planes, hammers, screwdrivers, clamps, and measuring tools.
  • Power Tools: Jigsaw, drill, sander, router, and table saw.
  • Other Tools: Marine-grade paint and varnish, epoxy filler, sanding blocks, and safety gear.

Construction Process: Building the Hull

The hull is the heart of the sailboat, providing buoyancy and stability. Building the hull is a multi-step process involving:

1. Framing the Hull:

  • Laying Down the Frames: Use the plans to accurately cut and shape the frames from wood, creating the ribs that form the hull's shape.
  • Assembling the Frames: Connect the frames to the keel and stem, ensuring proper alignment and spacing.

2. Planking the Hull:

  • Cutting and Shaping the Planks: Cut and shape the marine plywood planks according to the plans, allowing for proper beveling and curvature.
  • Attaching the Planks: Fasten the planks to the frames, overlapping each plank for a watertight seal. Ensure the planks are evenly spaced and aligned.
  • Filling and Fairing: Use epoxy filler to fill any gaps or imperfections in the planks, and sand the hull smooth for a fair, even surface.

3. Applying Epoxy and Finishing:

  • Epoxy Coating: Apply multiple layers of marine-grade epoxy to the hull, ensuring proper curing time between layers. This creates a watertight and durable barrier.
  • Sanding and Finishing: After the epoxy cures, sand the hull smooth and apply primer and paint for protection and aesthetics.

Constructing the Deck and Superstructure

After the hull is complete, you'll build the deck and any other necessary superstructure.

1. Building the Deck:

  • Framing the Deck: Use the plans to create the deck beams and supporting structure, ensuring proper alignment and strength.
  • Planking the Deck: Attach marine plywood planking to the deck framing, ensuring a smooth and watertight surface.
  • Adding Hatches and Openings: Cut and install hatches, deck hardware, and any other required openings.
  • Finishing the Deck: Apply epoxy coating, sand, and paint the deck for protection and a sleek finish.

2. Constructing the Superstructure:

  • Building the Cabin (if applicable): Create the cabin frames, walls, and roof, ensuring proper ventilation and watertight seals.
  • Installing Cockpit Seating and Hardware: Assemble the cockpit benches, seats, and hardware, including steering wheel, tiller, and control lines.
  • Adding Other Superstructure Elements: Install any other necessary elements, such as a mast step, boom supports, or navigation lights.

Rigging and Sailing

Once the hull, deck, and superstructure are complete, it's time to rig the sailboat and prepare for sailing.

1. Installing the Rigging:

  • Setting the Mast: Step the mast into its socket and secure it to the deck.
  • Attaching Standing Rigging: Install the shrouds and stays to support the mast.
  • Running Rigging: Attach the halyards, sheets, and other running rigging to control the sails.

2. Choosing and Installing Sails:

  • Selecting the Right Sails: Choose sails appropriate for the sailboat's design and intended use. Consult with a sailmaker for expert advice.
  • Attaching Sails to the Rigging: Secure the sails to the mast, boom, and other rigging components.

3. Launching and Sailing:

  • Launching the Sailboat: Carefully launch the sailboat into the water, ensuring it is properly balanced and stable.
  • Learning to Sail: If you are new to sailing, take sailing lessons or find an experienced mentor to guide you.

Maintenance and Care

Maintaining your wooden sailboat is crucial for its longevity and safety. Here are some essential tips:

  • Regular Cleaning and Inspection: Clean the hull, deck, and rigging regularly to remove dirt, debris, and salt build-up.
  • Checking for Leaks and Damage: Inspect the hull and deck for any leaks or damage and repair them promptly.
  • Replacing Worn Components: Replace worn or damaged rigging, sails, and other components as needed.
  • Proper Storage: Store the sailboat in a dry and well-ventilated area to prevent damage from moisture and weather.

Building a wooden sailboat is a challenging but fulfilling endeavor. By following these steps, you can create a timeless and beautiful vessel that will provide years of enjoyment on the water.

Share:

Recent Posts

Theme Support